How to Use KeePass To Log Into Websites
1. Getting Started
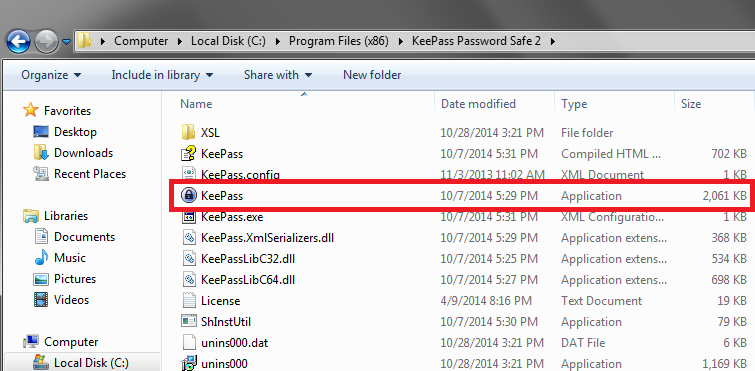
To start things off, find your KeePass program, for this guide, we will be launching from the install folder. During installation you should have designated an install path or opted to have a shortcut created on your desktop. The file in question is highlighted in red.

2. Database Creation / Entry Usage
In the previous article, we covered most of this information. If you have not read the previous article, feel free to follow this link to learn how to set up databases and add entries. For this example, we already have a database created.
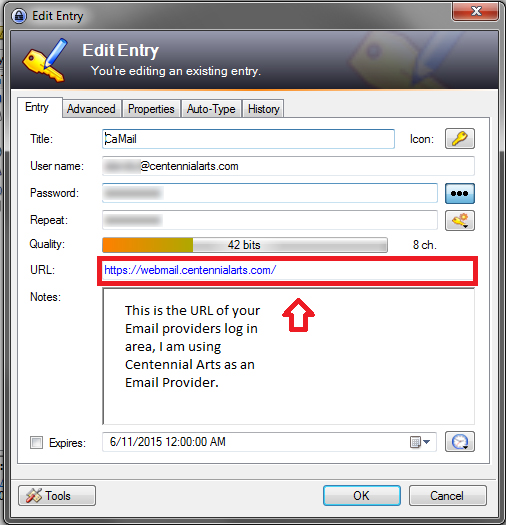
Using KeePass, we will use my “CaMail” entry to automatically log into my Centennial Arts Web Mail platform. To set up an entry to do this, right click your KeePass window and press Add Entry. Once there, enter your CaMail login credentials.
Note: If you do not have an Email account with us, you can use your email provider of choice as a substitute.
My CaMail entry is set up like this:


3. Using Your Entry
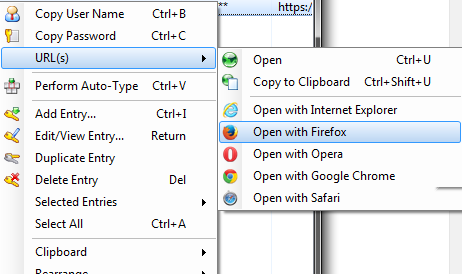
Now, you can navigate to your email login panel. If you added a URL to your entry like we did in this example, you can right click the entry in KeePass, drag your mouse to URL(s), and now you can select which browser you would like to use to open the designated URL.

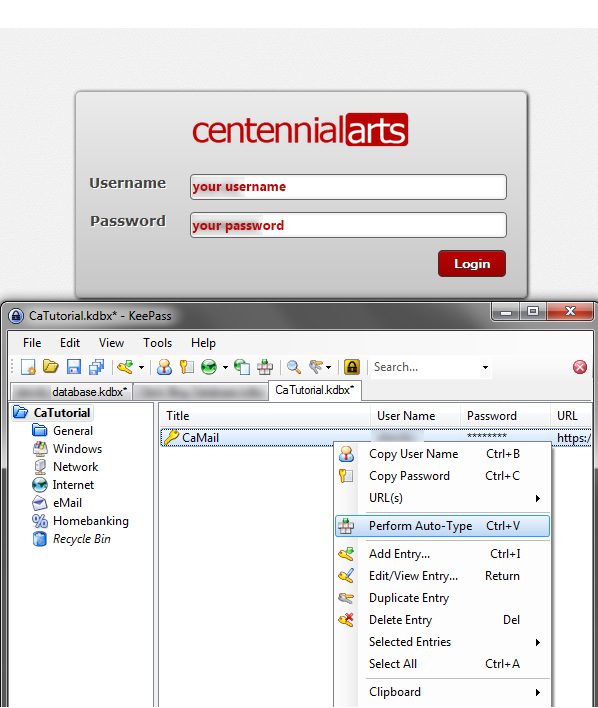
Once you are at your log in screen, you can select your entry and press Ctrl + V, this will automatically enter your credentials and in the end, log you into your webmail.

This wraps up our tutorial on how to use KeePass to log into websites, for more questions or inquiries feel free to contact us using the buttons below!


