Creating a Simple Product in Magento 2
Choose the Product Type
- Log in to the Admin and click Products on the Admin sidebar. Then, click Catalog under Inventory.

- Click the Add Product menu in the upper-right corner. Then, select Simple Product.

Choose the Product Template (Optional)
- If you have different Attributes Sets in you store, you will need to select the correct set before filling in the fields for the product. Enter or select the Template Name in the Search box.
- Choose the Template that you want to use from the list. The fields will update to reflect the Template.

Complete the Required Fields
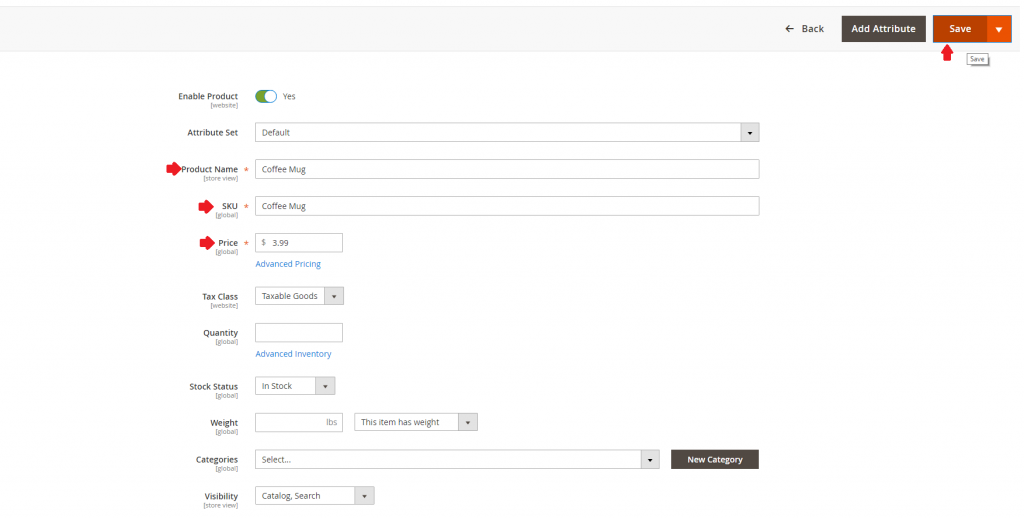
- In the Product Details section, complete the following:
- Enter the Product Name.
- You can either use the default SKU that is based on the Product Name, or enter another.
- Enter the Price of the Product.
- Set the Tax Class as either None or Taxable Goods.

- If you are ready to add a Product Image, do one of the following:
- Input the Quantity of the product that is currently in stock.
- Enter the product Weight.
- To assign the product a Category, perform one of the following:
- Begin by searching to find a match. Then, select the Category.
- Click Show List to see the Category tree. Then, click on each Category that you want to assign to the Product.
- Click New Category and enter the Category Name. Then, choose the Parent Category to determine its position in the menu structure. Lastly, click Create Category.

- Enter the Description of the Product directly into the text box and format it as needed.
- Click Save to publish the product.

- To view the product in your store, click on the Admin menu in the upper-right hand corner. Then, select Customer View.
If you are still unsure on how to create Simple Products in Magento 2 or are interested in our Magento Hosting services, contact us here at Centennial Arts with the link below!


