For the people out there that want to put the right information in yourself, well you have your first and only caWeb Designer that lets you do it yourself. Adding content Is the easiest thing to do in the caWeb Designer. You choose the content design and then just fill in the text and images. You can choose to either put your own images in the fields or you can choose the images that are already given to you. Today, I am going to teach you how to add content the right way.
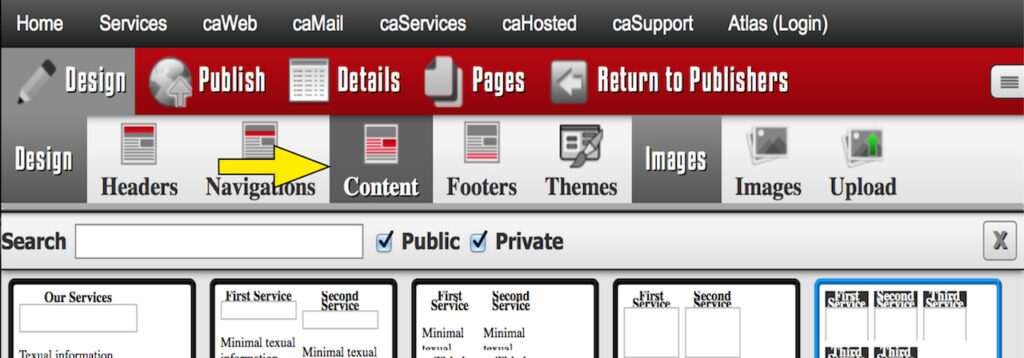
Instructions on how add Content in caWeb Website Designer.
To add content with the Designer you need to first click the content button on the toolbar above the site you’re creating.
When you have the content organizer section selected you can add and remove information in that section. If you want to change the text click the field and begin typing.

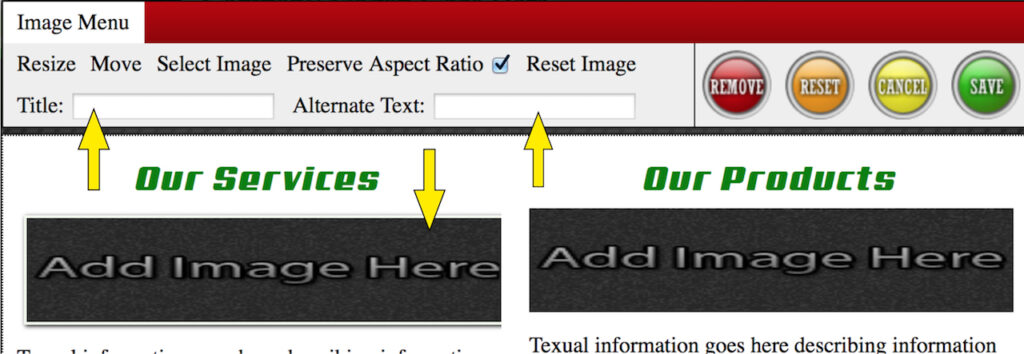
To add an image to a section, you can click the “Add Image Here” button, a preview is displayed below. After you have the image in place you can give the image a title and alternate text. (NOTE: If the content is the four image rotators you will see four large “Add Image Here” sections, however there is no reason to worry because when you do decide to preview the site, the actual images will be displayed rather than their respective placeholders.)
Now you can save (publish), preview, or view the site live by clicking on the publish button in the tool bar.