WordPress: Tips on Visual/HTML
Introduction
When you click to preview your article before publishing, sometimes the format looks completely different than what is on your WordPress visual screen. Here are some tips to help you change the format of your article in both visual and HTML to ensure the format on your preview will be what you want.
PROBLEM: Pictures or paragraphs are jumbled together and not spaced out properly
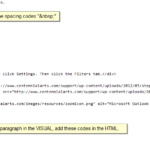
- To add space in between each new topic/picture/paragraph for correct format, put this in between each HTML paragraph.
-
-
-
- Also, put this code before and after the “More” line so separate articles do not run together.

HOW TO: Add super-scripts in the article to link to references

1
Add super-scripts to the text:
- In the HTML, add this to end of the word or sentence: <sup>REFERENCE NUMBER</sup>
- Example: According to Dean of Texas A&M, the university is ranked number two in the entire nation.<sup>5</sup>
2
Add super-scripts to the reference:
- In the HTML, add:<sup>REFERENCE NUMBER</sup> at beginning of the reference link, then add <a href=
- Put the first URL link in quotation marks (“___”)
- Add target=”_blank”> after the first link
- Add the same link again, without quotation marks
- Add </a> at the end of the second link
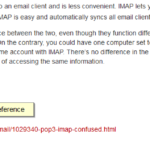
- Example: <sup>3</sup><a href=”http://forums.techguy.org/web-email/1029340-pop3-imap-confused.html” target=”_blank”>http://forums.techguy.org/web-email/1029340-pop3-imap-confused.html</a>
HOW TO: Add graphic numbers to the article with pictures to the right (if you are doing Step-By-Step instructions or a How-To article)
- This is mainly used if you don’t want the basic number/bullet format that WordPress offers.
1
To do this, add this in the HTML (***change the bolded text to your needs):
- <div class=”howToStep”>
<div class=”howToStepNum”>NUMBER OF STEP</div>
<div class=”howToInstruction”>INSTRUCTION OR INFO</div>
<div class=”howToStepImg”>
<div class=”thumb”><a href=”THIS URL LINK WILL AUTOMATICALLY UPDATE WHEN YOU POST THE PICTURE IN THE VISUAL“><img title=”Click Settings.png” src=”THIS URL LINK WILL AUTOMATICALLY UPDATE WHEN YOU POST THE PICTURE IN THE VISUAL” alt=”” width=”300″ height=”103″ /></a></div>
<div><img src=”http://www.centennialarts.com/images/resources/zoomIcon.png” alt=”Microsoft Outlook Webmail Setup: Step 1″ />Click to expand</div>
</div>
</div>
2
Repeat the same format for step 2,3,4…, but change the picture, number of step, and INSTRUCTION in the HTML section.
HOW TO: Add graphic numbers without pictures
1
Add this to HTML:
<div class=”howToStep”>
<div class=”howToStepNum”>NUMBER OF STEP</div>
<div class=”howToInstruction”>INSTRUCTION OR INFO</div>
<div class=”howToStepImg”>
</div>
</div>
HOW TO: Add highslide to an image
1
Highslide allows readers to click on an image to expand it without taking the reader to a new window. In order to do this, click Upload/Insert to add an image to your post and browse for the desired picture.
2
Click None for the alignment and then click the Thumbnail option for the image. Then click Insert into post.
3
If you click on the image in the post, an editing and delete symbol will show up at the top. Click on the editing symbol.


