How to Remove the Background from an Image in Windows
Introduction
Removing the background from an image can help create clean, professional graphics for websites, presentations, or marketing materials. Windows now offers a built-in Remove Background tool in the Photos app, making the process quick and easy.
This guide will walk you through:
- Removing a background using Windows Photos
- Saving the image with transparency
- Understanding image file types
Understanding Image File Types
- JPEG (.jpg, .jpeg) – Does not support transparency. Backgrounds will appear solid.
- PNG (.png) – Supports transparency, making it ideal for images without backgrounds.
- Other Formats (.gif, .webp, .bmp, etc.) – Some support transparency but aren’t as commonly used for high-quality images.
📌 Important: If you remove the background from an image of any file type, it will be converted to a PNG file to preserve transparency.
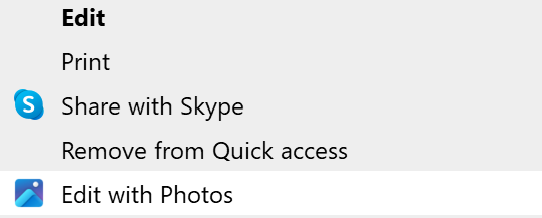
Step 1: Open the Image in Windows Photos
- Locate the image file on your computer.
- Right-click the image and select Edit With > Photos.
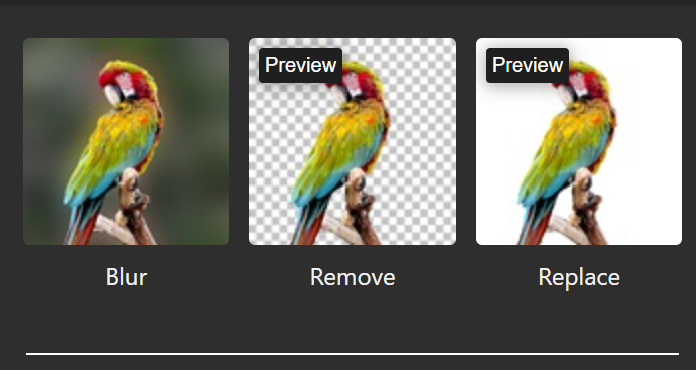
Step 2: Remove the Background
- In the Edit menu, click on the background icon.

- On the right, Click Remove, and the app will automatically detect and erase the background.
Step 3: Save as a Transparent PNG
- Click Save As Copy.
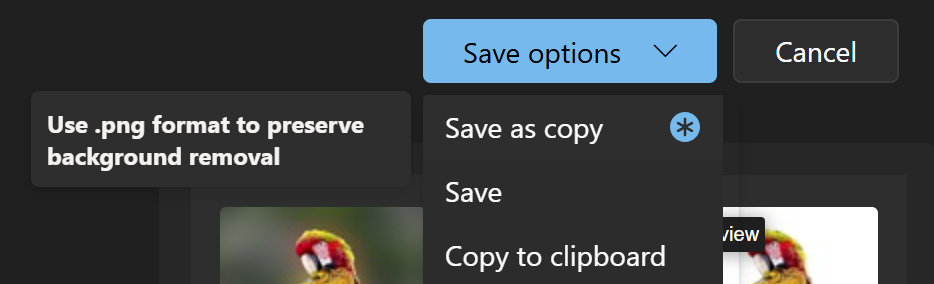
- Choose PNG (.png) as the file type.

- Ensure the image saves with transparency (Windows should do this automatically).
Conclusion
Windows Photos makes it easy to remove backgrounds with just a few clicks. However, for advanced edits, third-party tools may offer more control. Always save your image as a PNG to preserve transparency.